Drafting the one-piece convertible collar
Definition of the transformable collar
Drafting the one-piece convertible collar.
The convertible collar is a collar that behaves like two while remaining one.
Closed, with the front edges resting against the body, it reads as a shirt collar.
Open, when the fronts break, lapels appear and it becomes a tailored collar.
The convertible collar comes in one-piece and two-piece versions.
The convertible collar can be made in one or two pieces.
In this video, we analyze the one-piece version. It is especially used in extreme fabrics: very fine and transparent ones, to prevent seam allowances from being visible; or very thick ones, to avoid bulk at the junction between the stand and the fall.
Drafting
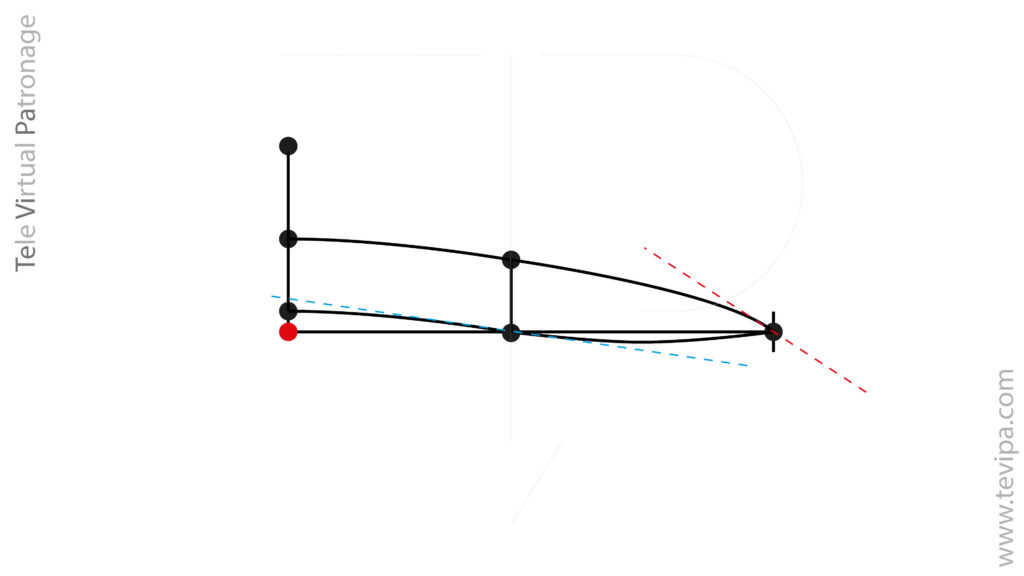
We measure on the pattern the length of the back and front necklines without seam allowances.
We add one centimeter of seam allowance. This measurement is the half neck circumference.
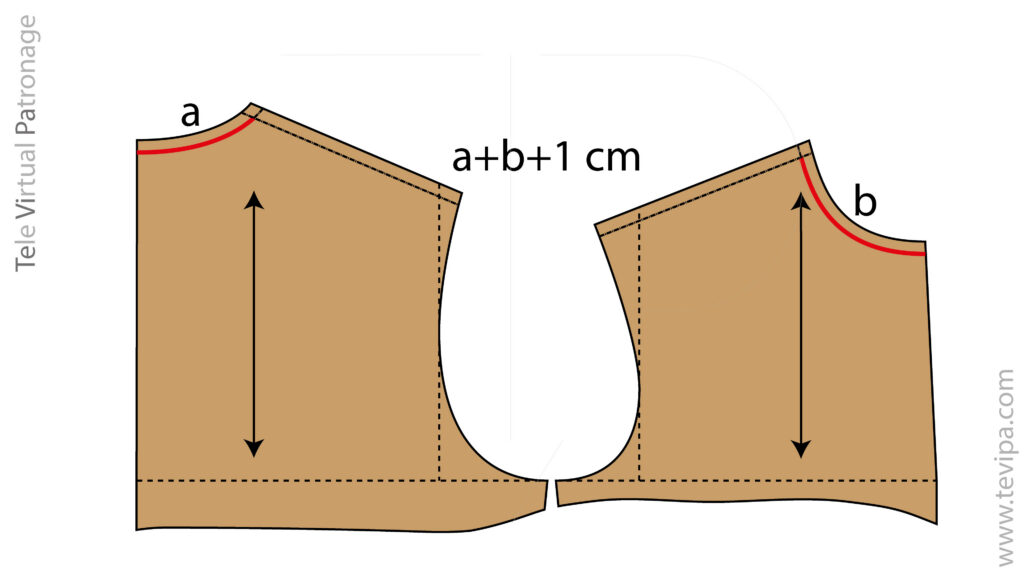
From a point representing the seventh cervical vertebra, we place the half neck circumference including the seam allowance.
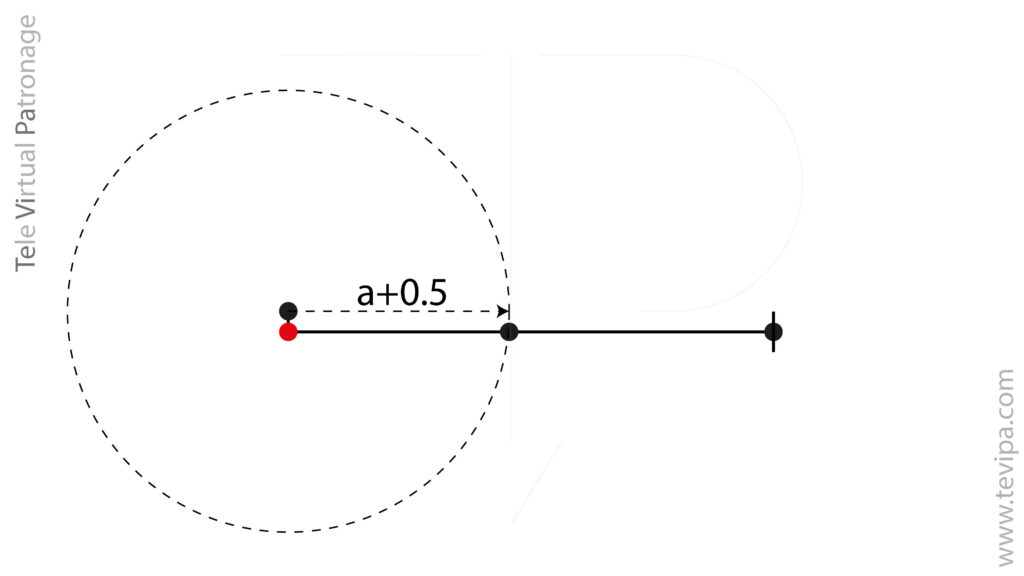
From this point, we raise one centimeter.
From this new point, we draw an arc, with a radius equal to the back neckline length, plus half a centimeter. We mark the intersection between this arc, and the construction line of the collar stand.
At the midpoint of the front neckline, we mark a point half a centimeter below the construction line of the collar stand.
We draw the final collar stand line. We start from the point representing the seventh cervical vertebra, moving parallel to the construction line, then we round the line to reach the first point and close with a convex curve.
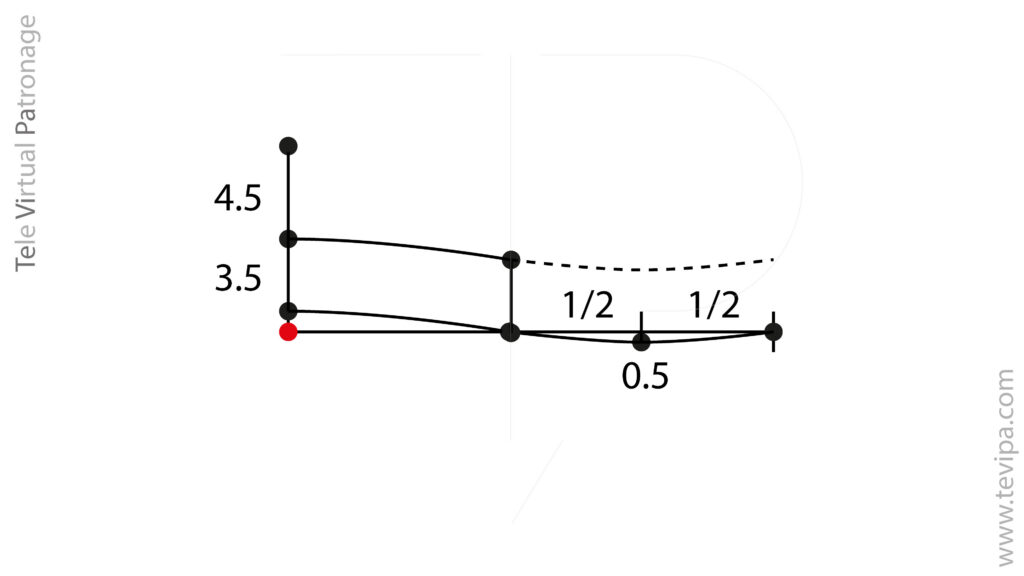
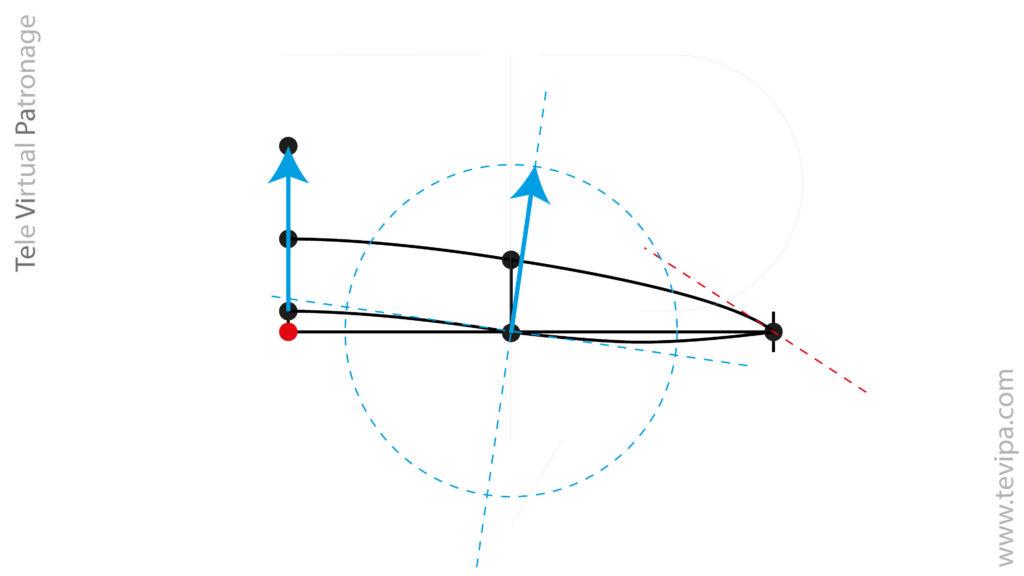
From the first point of the collar stand seam, located above the seventh cervical vertebra, we draw the perpendicular to the construction line and place the stand height, adding one centimeter of seam allowance.
On this point, we place the fall height, also adding one centimeter of seam allowance. In this example, the stand measures two and a half centimeters plus one centimeter of seam allowance, that is three and a half centimeters in total.
The fall must extend beyond the break line by between one centimeter and one and a half centimeters to cover the stand seam. The fall measures three and a half centimeters plus one centimeter of seam allowance, that is four and a half centimeters in total.
From the stand, we draw a line parallel to the seam. This is the break line.
We draw a tangent at the front midpoint and another at the neckline point on the stand seam.
At the neckline point, we draw the normal, that is the perpendicular to the tangent, and on this line we place the collar width measured from the center back.
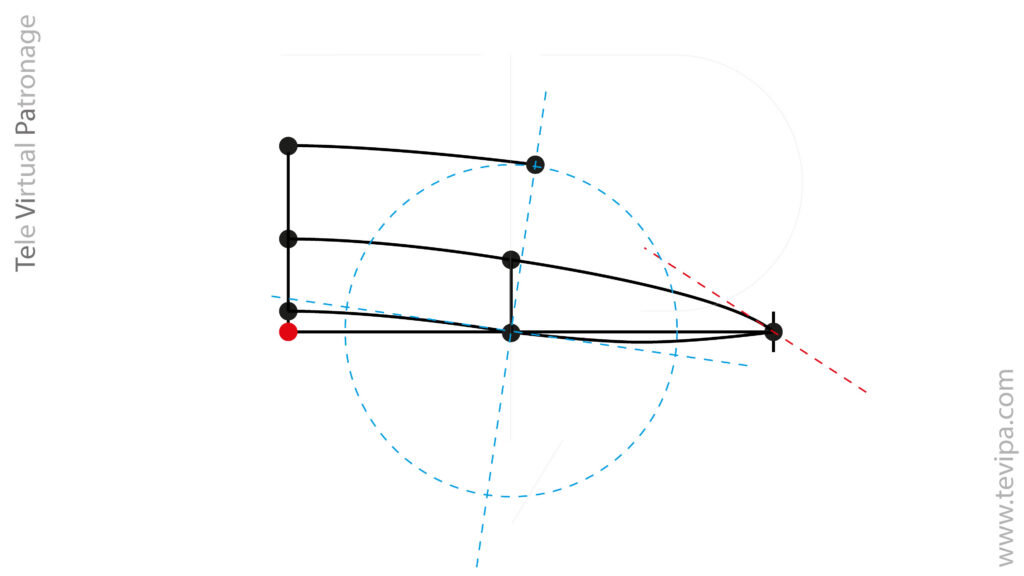
From the center back, we draw a line parallel to the break line up to the previously defined point.
We draw a line one centimeter below the stand line. This is the back fall seam line and we stop at the back neckline point. On the front, we draw the collar shape as required. The example shows four variations.

The tangent at the front midpoint serves as the axis to mirror the front part of the collar. Once mirrored, we connect it to the last point.
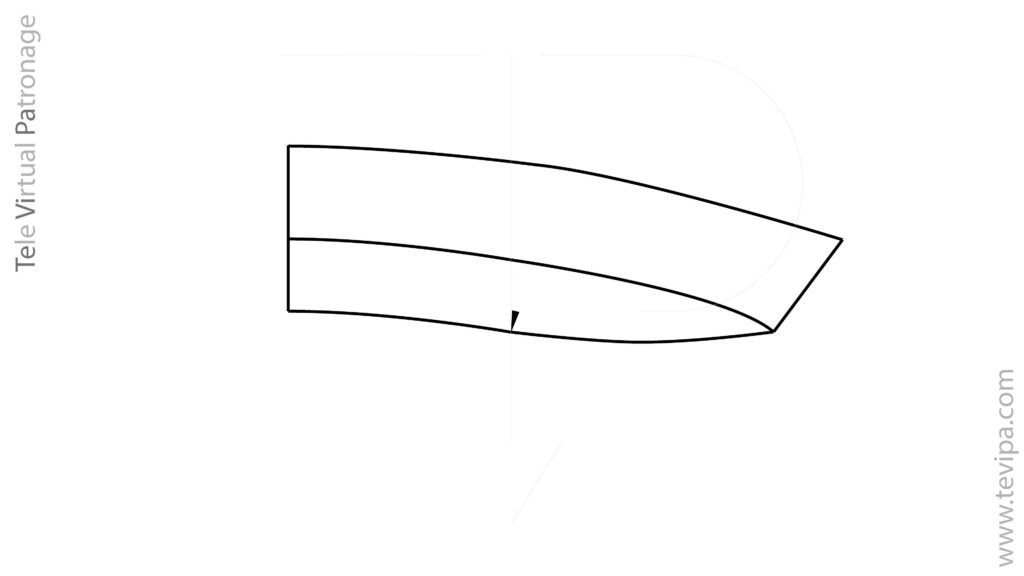
We remove the construction lines.
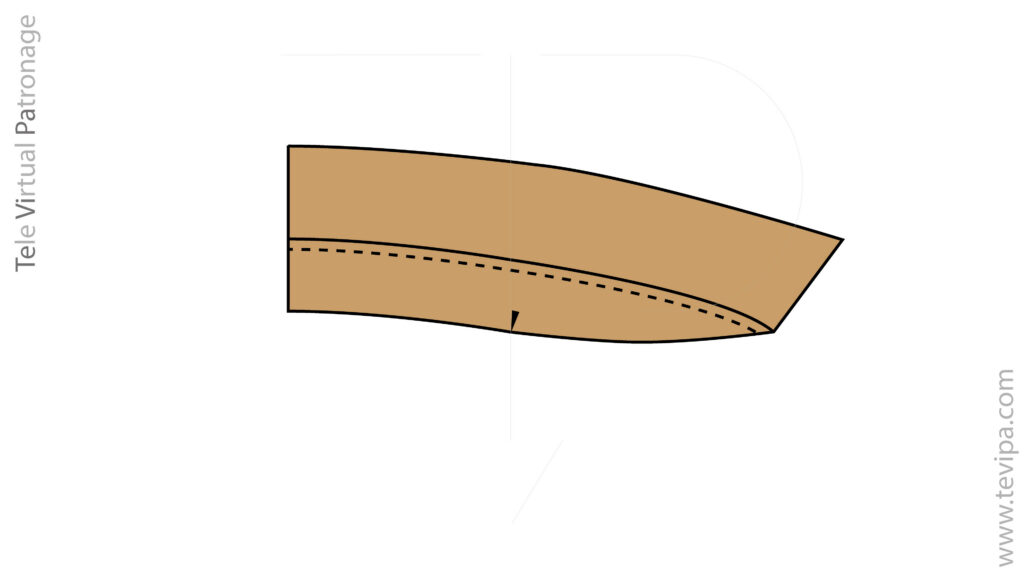
Many garments, especially those made from fairly thick materials, avoid a two-piece collar to prevent added bulk.
In such cases, a topstitch runs before the break line so it stays hidden and does not show on the outside.
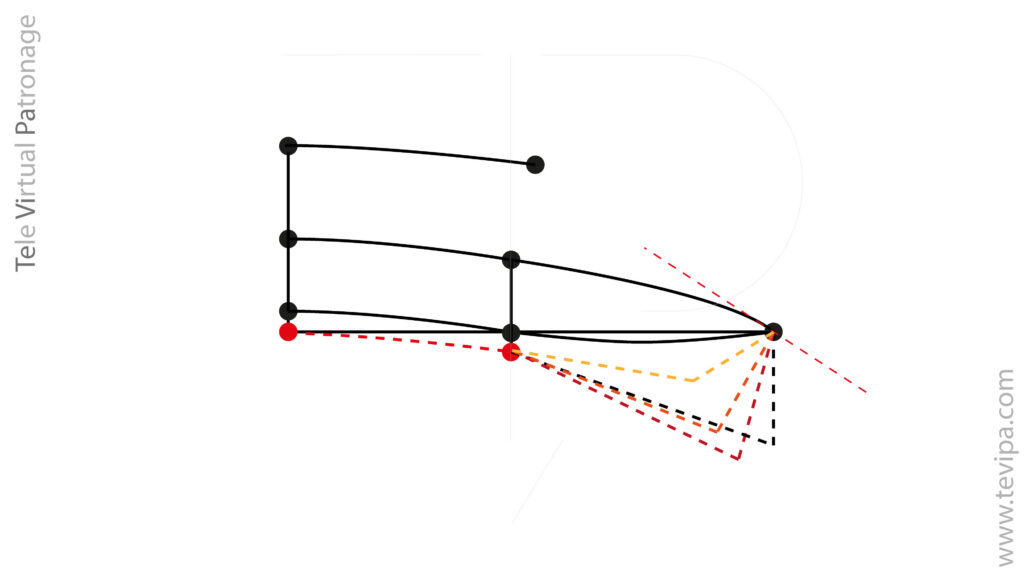
So far, we have developed the under collar; the upper collar is usually cut wider so it has enough turn-of-cloth, so it does not pull when it turns, and so it hides the seams inside the under collar.
A maker usually adds extra length along the whole fall and the front edge of the collar; this value changes with the thickness and stiffness of the fabric or material used to make the collar.
At the collar stand seam, the maker adds a second extra length.
For a conventional fabric, typical values could be half a centimeter on the fall and front edge, and three millimeters on the collar stand.
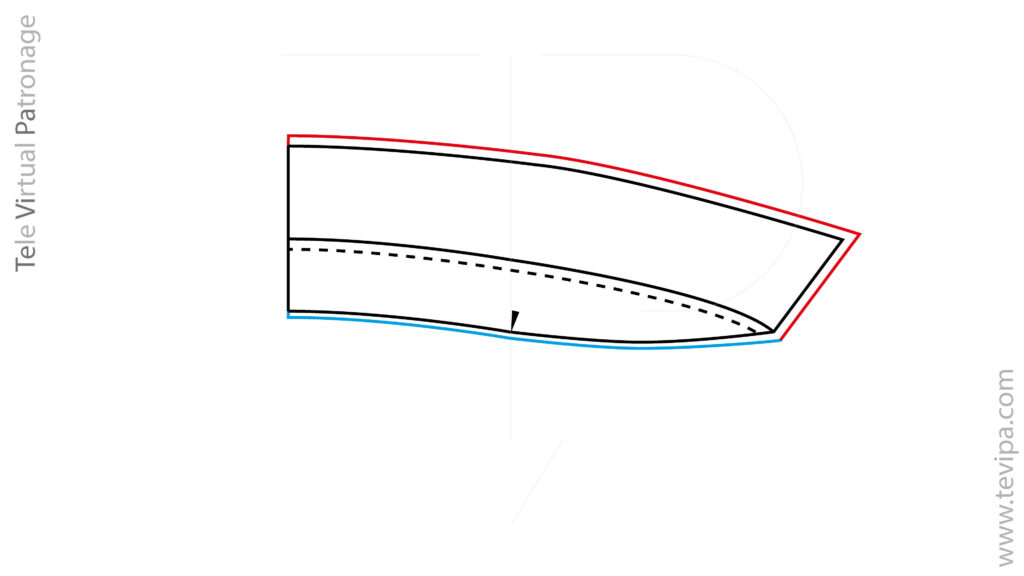
Seam Allowances and Grainlines of Collars

We present collars without a center-back seam.
Many makers cut the under collar on the bias, with a center-back seam, and cut the upper collar on the fold.
If you cut it with a center-back seam, you must add a seam allowance; in our case, 1 centimeter.
If you cut the under collar on the fold, place the grain along the center-back line.