Pattern Grading: Complete 3-Part Guide
This is a living index for the Grading series. Everything is published in a single post so you don’t have to chase separate entries. From here you’ll access all three parts: at first only the first one will be live, and the others will activate with their videos on the scheduled dates.
What you will learn
- 01. Basic concepts of grading: symbols, base and extreme sizes, in-between sizes and types of measurement tables.
- 02. Ratios: how to calculate them (simple and complex) and what happens if anchor points are changed.
- 03. Parts that are not graded: disregarded dimensions, non-proportional cuts, ease, seams, and transformations.
01. Basic concepts of grading
Concept of grading
Grading is the systematic process of obtaining a range of sizes from a base size, distributing increments and decrements across the pattern’s points.
Base size and extreme sizes
The base size is the origin of grading. Extreme sizes define the limits and ensure coherence in proportions and ease.
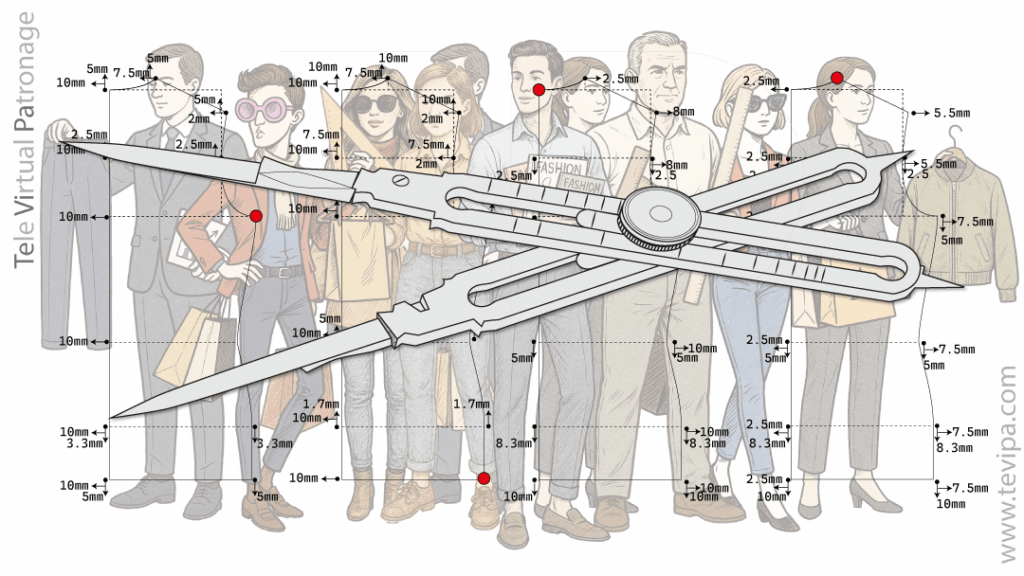
Symbols used
- Point → displaced node
- Arrow → direction of displacement
- Double arrow → bidirectional displacement
- Anchor point → fixed reference
In-between size and break of in-between size
The in-between size is the step between contiguous sizes. A break appears when progression is no longer linear.
Types of measurement tables
- Proportional
- Anthropometric
- Mixed
Examples of grading points
- Horizontal
- Vertical
- Oblique
02. Ratios
Dimension and measurement
We distinguish dimensions (geometric magnitudes that define the pattern) from measurements (numeric values assigned).
Ratio calculations
- Simple: direct proportions
- Complex: non-linear progressions, axis combinations
Changes in anchor points
- How to modify anchor points
- Re-calculation of ratios after the change
03. Parts that are not graded
Dimensions and cuts
- Disregarded dimensions
- Non-proportional cuts
- Ease and seams
Transformations
- Orthogonal
- By rotation