Base Pattern of the Straight Tailored Skirt
Essential Guide to Geometric Patternmaking with Full Demonstration Video
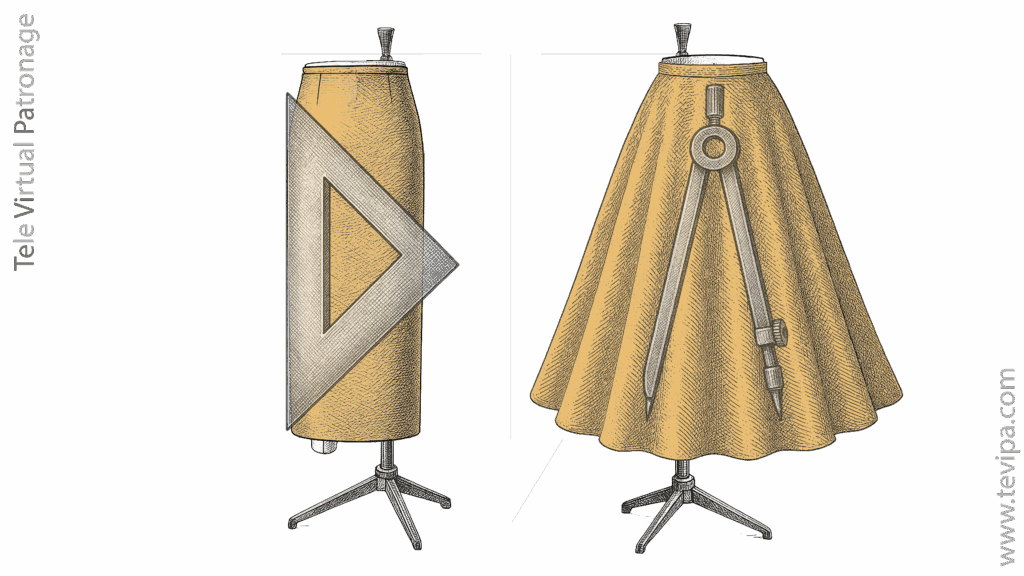
The straight tailored skirt is one of the foundations of geometric patternmaking. It represents the opposite of the circle skirt: while the circle skirt is built with radial lines, the tailored skirt is born from a structure that is strictly orthogonal to the vertical axis of the body.
It is a clear, architectural and extremely precise system, essential in both men’s and women’s tailoring.
In this guide you will find:
- The complete conceptual explanation
- The required measurements and the logic behind them
- The geometric structure of the draft
- A morphological comparison between male and female bodies
- And, of course, the complete step-by-step demonstration video
Contents
- What is the straight tailored skirt
- Required measurements and their logic
- Full drafting video
- Geometric structure of the pattern
- Morphology: male and female
- Principles of balance and ease
- Workshop tips
- Frequently asked questions
- Continue learning
- Patternmaker’s tools
1. What is the straight tailored skirt
The straight tailored skirt is the base pattern that best represents the philosophy of geometric patternmaking. It is built upon:
- Vertical and horizontal lines
- Clear axes
- Controlled proportions
- A fast, clean and reproducible draft
Unlike the circle skirt —where volume emerges from radius and arc— the tailored skirt begins at the position of the fourth lumbar vertebra, from which the entire structure is developed orthogonally.
The result is an extremely stable pattern, firm and adaptable to any length or style.
2. Required measurements and why they are used
For this pattern we only need four essential measurements:
a) Waist girth
b) Hip girth
c) Hip length
d) Crotch rise
These measurements define:
- The true height of the waist plane
- The natural hip line
- The development of the crotch
- The balance between front and back
- The inclination of the side seam according to anatomy
The video explains in detail how to take each measurement and why each one corresponds to the real morphology of the body.
In the blog you will find direct links to the section on human body measurements, where the measurements are shown correctly.
3. Full drafting video
In this video you will see:
- The complete draft from the waist down to the crotch line
- The real application of ease and waist-shaping darts
- The natural inclination of the waist plane
- The simultaneous construction for male and female morphology
- How to lengthen the pattern to any desired length
The visual demonstration is indispensable: nothing replaces watching the real-scale drawing.
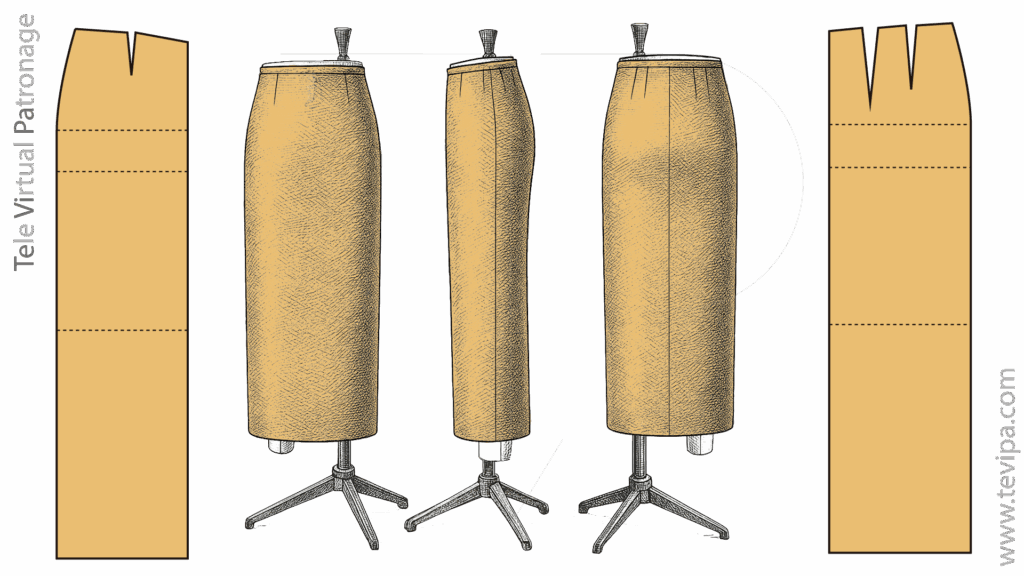
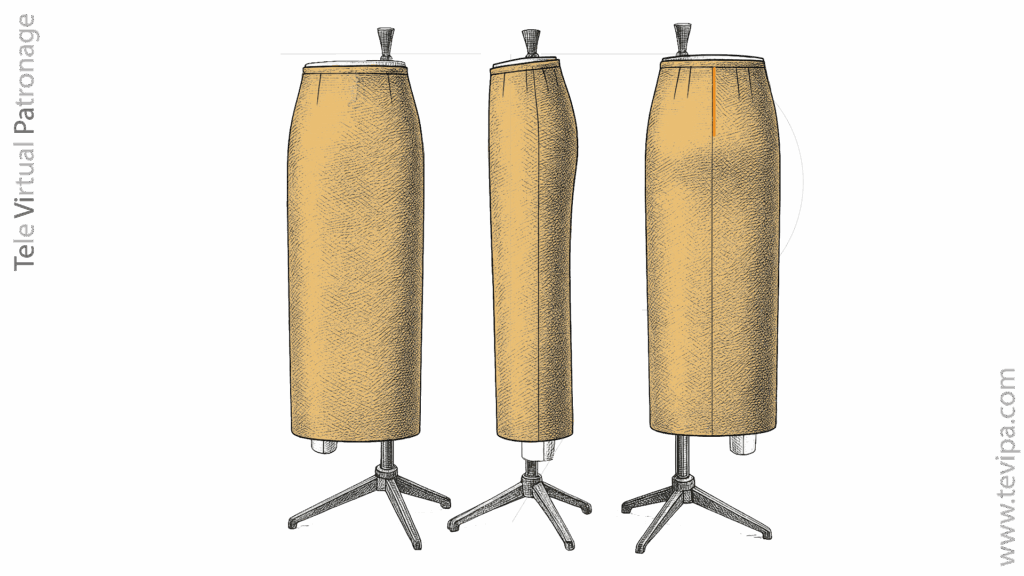
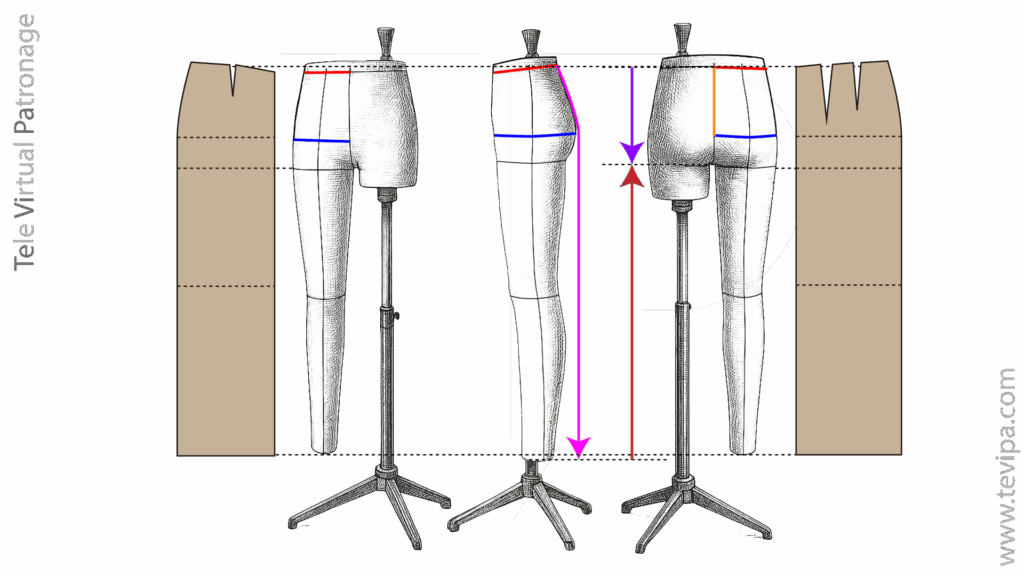
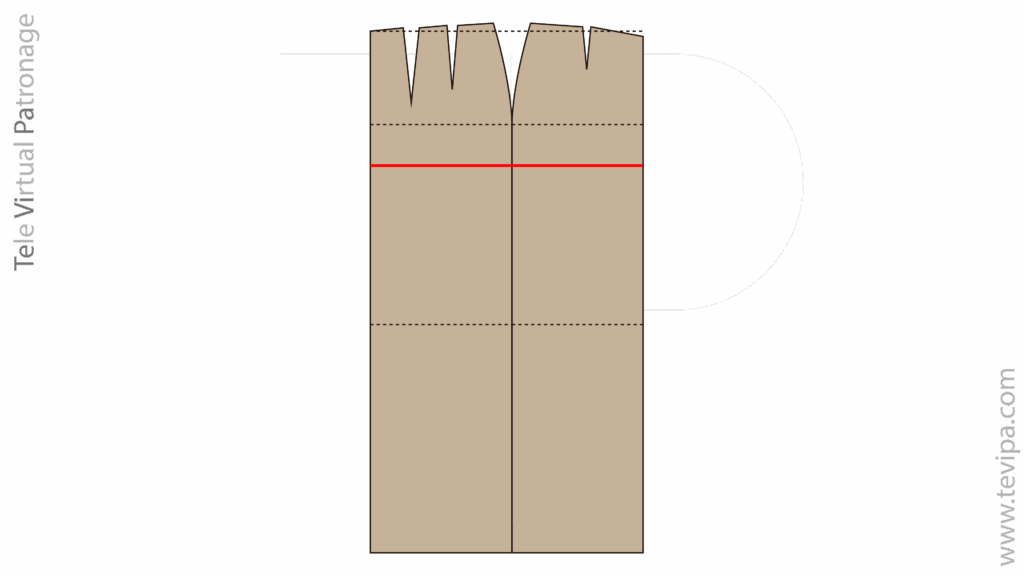
4. Geometric structure of the pattern
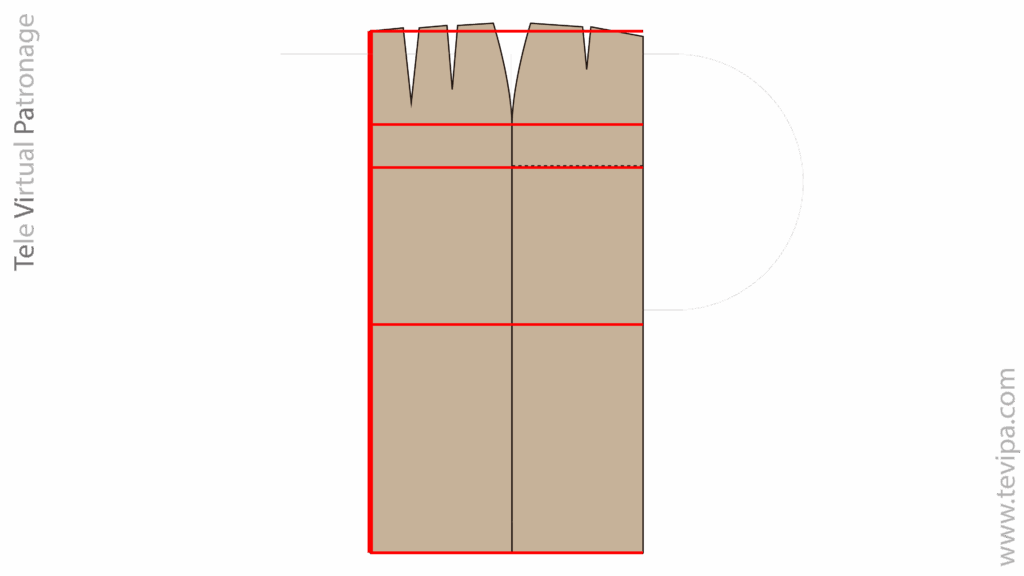
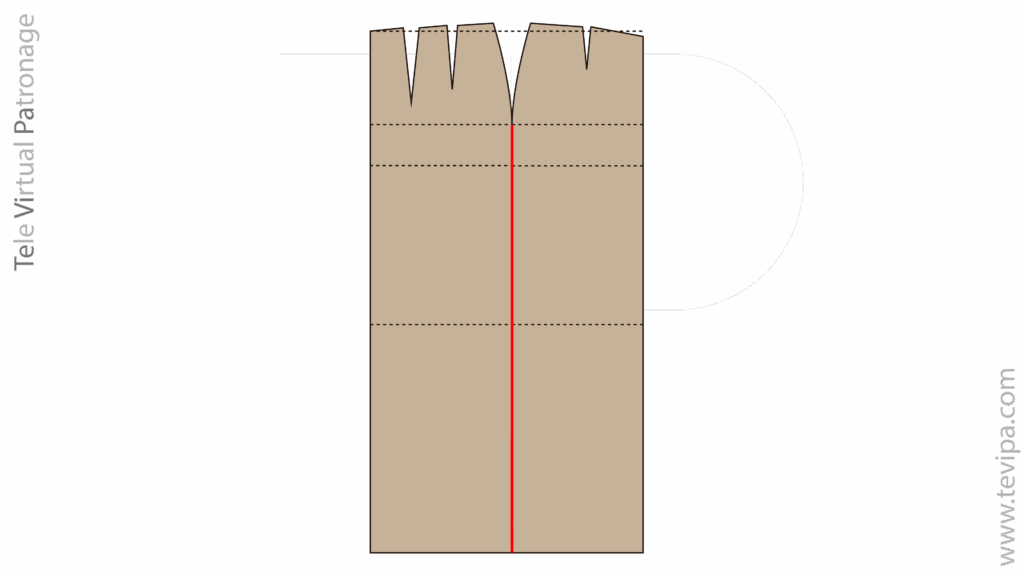
The pattern is built from a central vertical axis corresponding to half of the back.
From this axis, the main lines are organised:
▸ Waist line of the pattern
This is the starting point of the draft.
It does not match the finished waistline of the pieces: it is a base line used to construct the true waistlines of front and back.
This line has a slight natural inclination that must be reproduced.
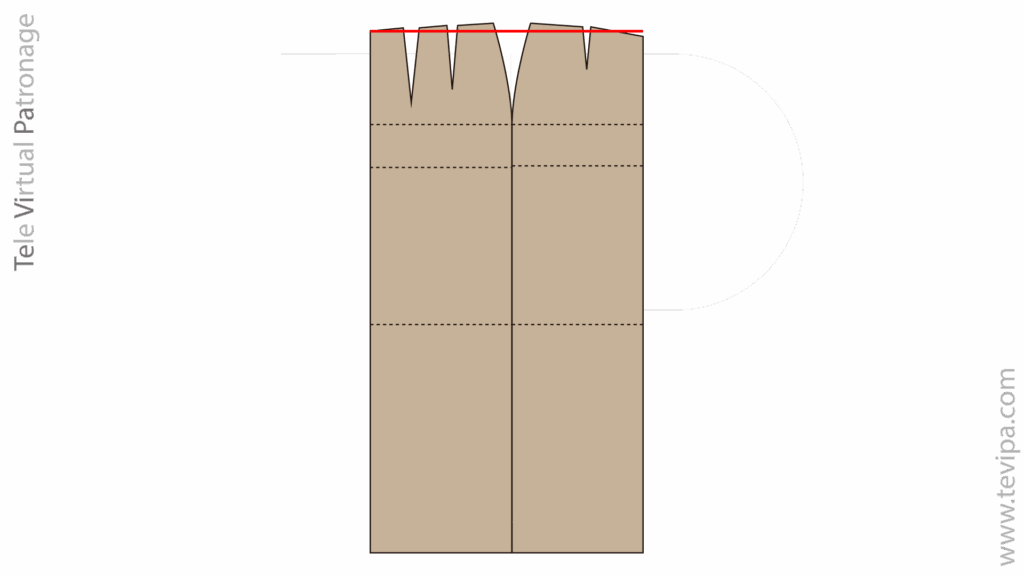
▸ Hip line
Located exactly at the hip length measured from the fourth lumbar vertebra.
It is the most important measurement of the pattern, but it does not determine the finished garment’s size.
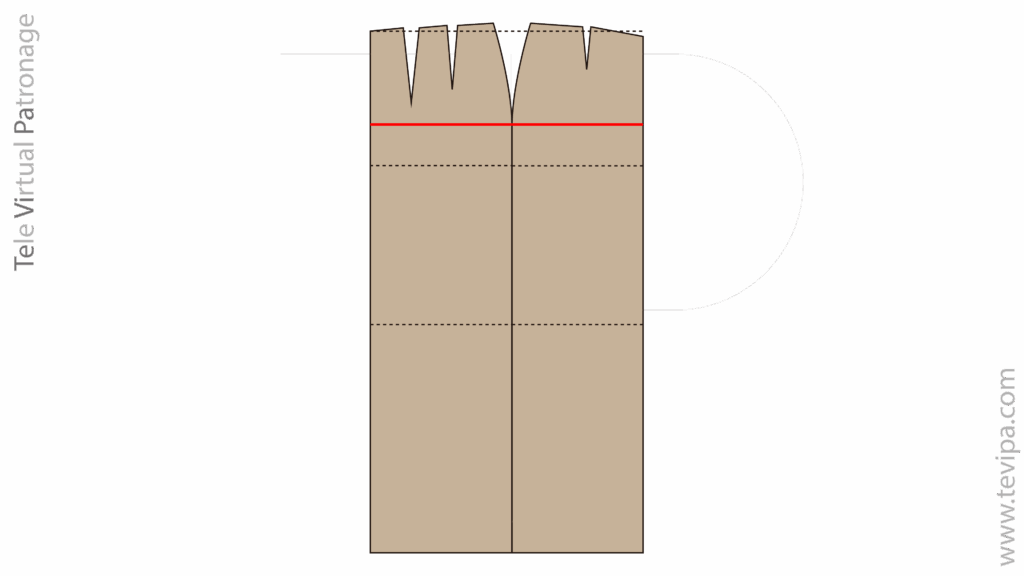
▸ Crotch line
Defined by the crotch rise.
It marks the end of the first phase of the base draft before lengthening the skirt.
From this line downward, the straight skirt is extended with a rectangle perpendicular to the floor.
▸ Centre-front line
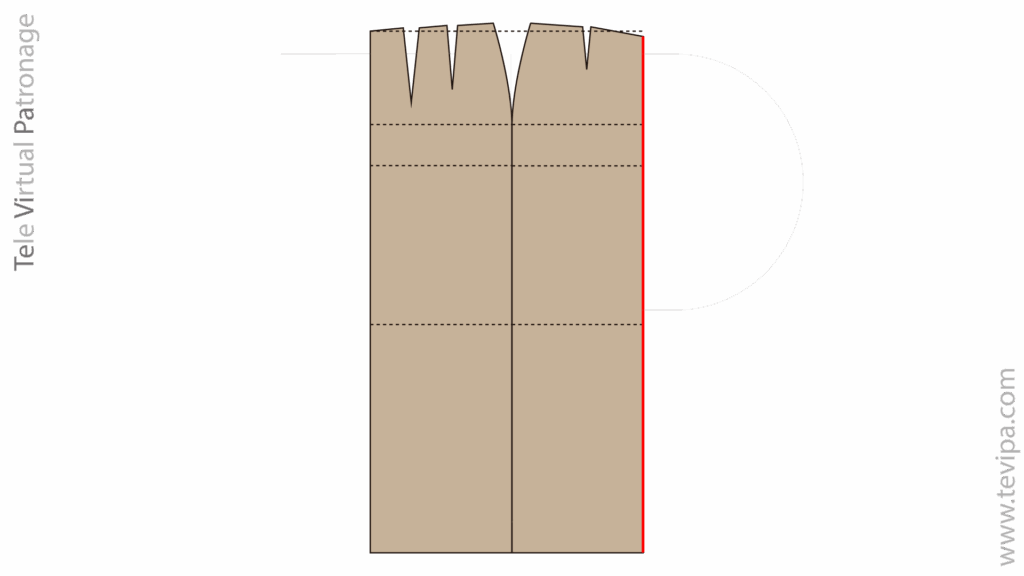
Obtained by applying the hip girth plus the necessary ease.
▸ Side seam
It is not symmetrical: it is shifted towards the front to compensate for gluteal volume.
This ensures the seam aligns with the true side of the leg.
▸ Darts
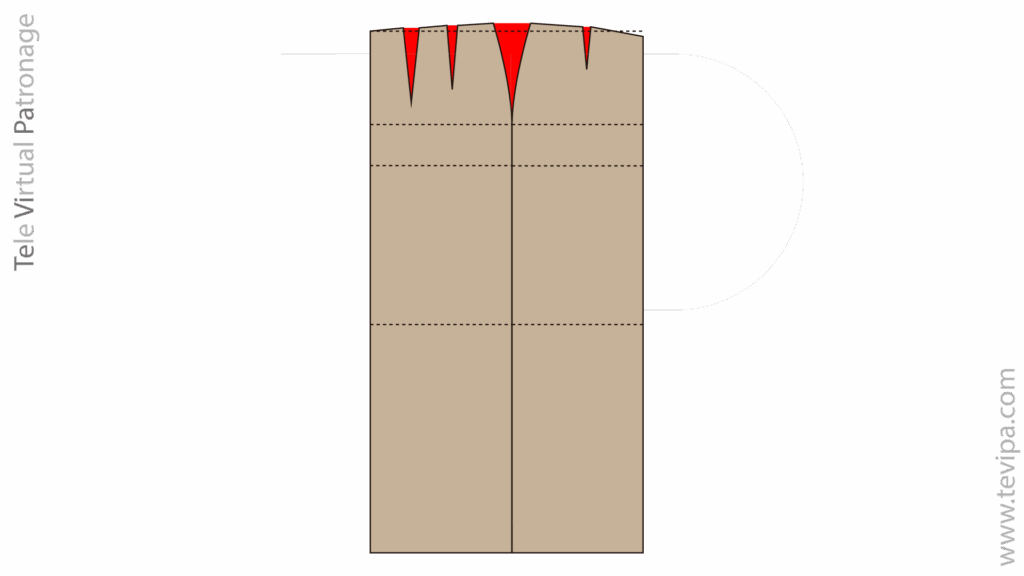
They compensate for the difference between waist girth and hip girth.
Their distribution varies according to morphology.
They are explained in detail in the video.
5. Morphology: male vs female
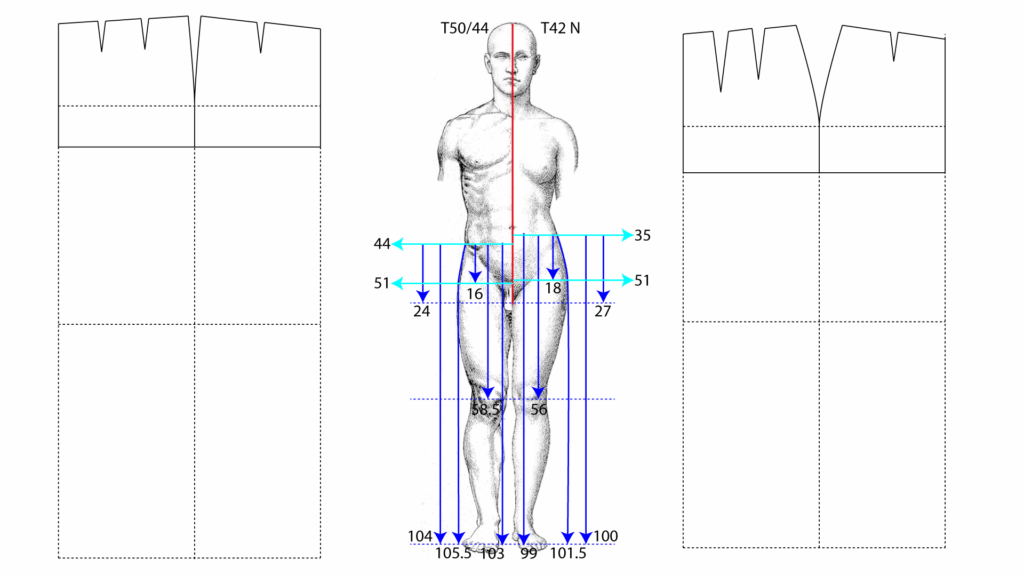
At the end of the video you will see an exceptional figure:
a hybrid body divided along the sagittal axis.
- Left side: male morphology
- Right side: female morphology
- Both are equalised to 51 cm of half hip girth
- Male: size 50/44
- Female: size 42N
This comparison allows you to observe simultaneously:
- Changes in the inclination of the waist plane
- Different distributions of darts
- The behaviour of the side seam in both bodies
A demonstration rarely found in traditional manuals.
6. Principles of balance and ease
A well-drafted tailored skirt must:
- Fall straight without opening when walking
- Not rise to one side
- Sit down without resistance
- Keep the side seam aligned
- Avoid unwanted folds
- Not cling to the hips
To achieve this, controlled ease is applied.
Standard hip ease is:
1 cm in the pattern — that is, 2 cm in the finished garment.
7. Workshop tips
- Always measure the back leg length: it is the key reference.
- If the front dart marks, increase intake; if it pulls, reduce it.
- For the draft, add 1 cm to the half waist girth.
- For the waistband, use the real measurement, not the increased one.
- That small margin prevents small rolls of flesh from appearing under the waistband once the skirt is worn.
8. Frequently asked questions
Is it a good base for a pencil skirt?
Yes. A pencil skirt is obtained by reducing the hem width.
How much ease does a classic tailored skirt have?
1 cm in the pattern → 2 cm real.
Is it suitable for stretch fabrics?
Yes, adjusting ease and removing darts. This will be covered in another post.
9. Continue learning
I recommend this order:
- Circle skirt
- Reduced-flare circle skirt
- Straight tailored skirt (current post)
10. Tools for the traditional and digital patternmaker
Modern patternmaking combines the classic workshop with the digital environment.
These tools are essential:
Computers
- Powerful laptops with good graphics
- Stable desktop computers for long sessions
- Adjustable stands for ergonomic posture
Vector software
- Adobe Illustrator
- Affinity Designer
- Inkscape
- CorelDRAW
Peripherals
- Vertical auxiliary screen
- Precision mouse
- Graphics tablet
Printing and cutting
- A0 plotters
- A3 printers for tiled layouts
- Kraft or continuous paper
- Rotary cutter + cutting mat
Workshop tools
- Tracing wheel
- Sleeve board
- Pattern weights
- Ruler, square and set square
- Curve rulers
Closing
The straight tailored skirt is one of the essential patterns of geometric patternmaking.
Its clean structure turns drafting into an exercise of precision and clarity.
If you found this content useful, watch the full video and continue exploring the next guides on the blog.
You may also be interested in exploring the following related content: